WARNING: This page may take a while to load due to illustrations. It's designed for users with little computer knowledge, so illustrations are essential for understanding. Thank you.
If you have trouble understanding anything, please email one of our IRCops listed on the NastyCode Team home page for assistance.
This page has been updated for the newest version of mIRC.
Instructions
1. Downloading the mIRC Installation Executable:
This is a fancy way of saying that you're grabbing the program off the net and getting ready to install it.

By clicking on the icon above, you should be able to download the IRC client mIRC. When the dialog box appears, you have two options:
- Download the install file onto your computer for future use.
- Open the file without saving it permanently.
Select the "Open" option. When the download is complete, it should run the Installation Program automatically.
2. The Installation Program
When you run the Installation software, you should see a window that looks like this:
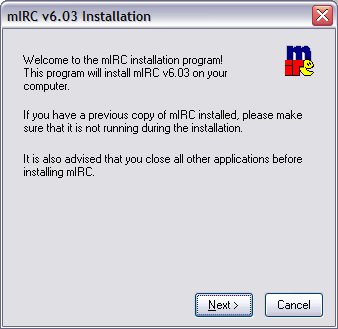
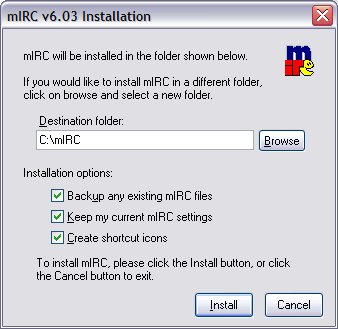
Press 'Next' and agree to the license agreement by pressing 'Yes'. You can set the installation directory to your preference, but the default is recommended. Leave the three checkmarks as-is and press the Install button.
The installation will begin, and when complete, you will see a confirmation window. Press OK to start setting up the program.
3. Setting mIRC Up for Your First Connection
The mIRC installation software should have created a window that looks similar to this:
If it's not there, you can find it under the Start button. This should open mIRC, and after closing the About mIRC window, the setup window will appear.
Make sure to enter the following network info:
Description: NastyCode
IRC Server: irc.NastyCode.com
Port: 6667Use a fake name in the Full Name box, but please enter your real email address for password recovery.
You must enter a nickname in the nickname field. If your primary nickname is taken, mIRC will prompt you to enter an alternative.
4. Getting Started Using mIRC
In the upper left corner, there should be a lightning bolt icon to connect to IRC. You should see messages indicating your connection status.
This means you're connected, and a window should pop up showing a list of default chatting channels. Uncheck 'Pop up Folder on Connect' and press OK.
To join a channel, type the command
/join #pncin the input strip at the bottom and press enter.5. Conclusion
That's about it for this page. If you have suggestions for changes or updates, let us know. If you need help, don't hesitate to email an IRCOP (list on the home page).
Hope this page has helped you get on IRC. Feel free to ask questions once you're on IRC, and we'll be happy to assist!
Have Fun!
|
*** Connecting to irc.NastyCode.com Port (6667) |
This means you're connected and a window should have popped up that looks like this:

This is a list of some of the 'default' Chatting channels, but for our example we'll use a local one. (By The Way, almost all channels have a # symbol in front of their name, and none have spaces)
Take the checkmark off the 'Pop up Folder on Connect' box and press the OK button (you can bring this window up at any time by its button on the button bar in mIRC, it's the third button from the left).
Now, on the bottom of every window in mIRC, there is a little strip where you can type.
All commands in mIRC start with the / character, for example, if you wanted to join the #NastyCode channel, you type the following command:
/join #pnc
Make sure to press enter at the end so it sends the command and a new window should pop up.
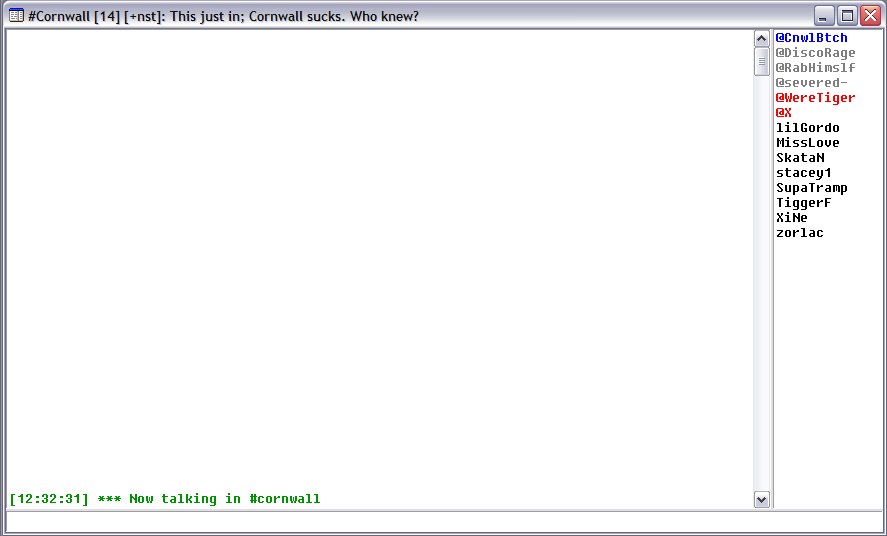
This window has the familiar strip across the bottom where you type, but now the window is divided in two parts by that scrolling bar.
The left-hand window (where it says *** Now talking in #pnc) is where you will see people talking. You can only talk to people who are IN #NastyCode right now in this window (but you can be in as many different channels at once as you want).
On the right-hand side, you can see the nicks (nicknames) of the people in the channel.
People with @ symbols in front of their Nicks are people who have what is called 'ops', which is short for 'Operators'. They have the power to kick, ban, promote people to ops and take ops away from people as well as other controls. Whoever gets into a channel first automatically gets ops for that channel and can then choose who else to give ops to. (unless the server has what's called 'chanserv' which is a system whereby people can register channels so that it isn't who comes first that gets ops, it's the channel owner.)
Well, that's about it for this page for now. If you can think of anything that needs changing, updating, or adding, let us know. Remember, if ANYONE needs help, don't hesitate to e-mail an IRCOP (list is on the home page). If you're having trouble with your e-mail, contact your ISP support staff, THEN e-mail one of us :)
(by the way, :) is a sideways smiley face)
Hope this page has helped shed some light on how to get on IRC. Once you're actually on IRC, feel free to ask any questions you have, and we'll be more than happy to help you out. If we're away, don't worry, just leave an e-mail address and someone will get in touch with you!
Have Fun!
© Copyright Modified Date:03/12/2025 NaStYcOdE Team. All rights reserved.